I first started taking detox baths even before we knew that mold and chemicals were problems, or that I should be detoxing them! I originally was taking Epsom salt baths with the purpose of easing my extreme joint pain. It did ease the stiffness a bit, not a lot, but every little helpful bit felt huge. I did that, taking about thirty minute baths with Epsom salts in it everyday. Aside from the slight joint relief, I also noticed dizziness after the baths. I only realized why that was later: that the salt was not only helping my joints, but also pulling toxins from my body. And when large amounts of toxins are taken in a short time, it can make you weak for a few hours.
After finding out that mold was one of my family’s major problems, we began taking the steps to get out of our house that was so seriously contaminated. We spent the next few months living on the road, house hunting, and so at that point the baths dropped off. Once we finally got to a more settled place and a regular routine, I began them again, but this time with some more research under my belt (or rather, my mom’s:)), and with the purpose of detoxing, not just joint help. When I first started re-introducing them, this time with Bentonite clay as well as salt, I didn’t find that they helped. At all. All they accomplished was making me feel added tiredness for the rest of the day. Eventually I got to a bad place though, and I was ready to try it again. This time I took it at night, and went straight to bed afterward. that ended up being a good thing, because the moment I stood up from the bath however, I grabbed the bathroom counter, as I found it was hard to support myself. Miserable. But, as I said, I went to bed right away. I slept really well that night, and woke up in the morning…. GREAT! Of course, it didn’t cure me, but as long as I took a bath every day I was exposed to something (either mold or chemical) it helped significantly.
Tips:
- Take the bath right before bed, make sure there is nothing else you need to do before getting into bed.
- Take a glass of cold tea or water with you. (There are even detox teas, which I find very tasty.)
- Don’t get your hair in the clay-water… just don’t. It takes a few days to get it out.
Step-By-Step Instructions:
- Get the hot water running, and put the salt in first, as much as will dissolve in the water… a few cups, probably. I usually use the brand Dr. Teal’s. Make sure it is unscented and completely plain. Also, depending on how often you need to take the baths, it is possible to buy it in bulk online or at Costco.
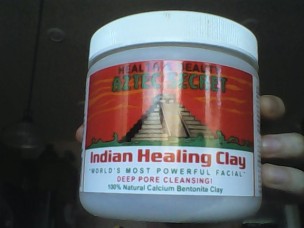
- Before the salt has dissolved, add enough clay to make the water brown, and mix the salt and clay into the water. It is important to add the salt first or with the clay, because it helps to break up the clay clumps. Otherwise the clay just sticks together. Having tried several brands, the clay that I have found works the best is this one, which also comes in bulk online:

Aztec Secret Indian Healing Clay 100% Natural Calcium Bentonite Clay
- Add 10-20 drops of both essential oils lavender and peppermint. They aren’t required, but surly do their part in helping. If you do use them, though, use less of the peppermint, you can always add more if you need. Too much, however, can sting and make your eyes water painfully.
- Stay in the bath for about forty minutes, with as much of you submerged as possible. If you live in a warm place, like me, it may get very hot. Try to stand it as best you can, because part of the effectiveness of the bath is the sweating. Don’t make it miserable though. This is where the cold tea or water comes in.
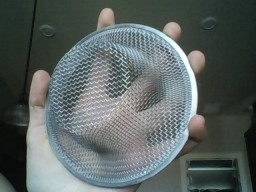
- Once you are done, getting the clay out of the tub is the hardest part. You can’t let it go down the drain, because over time it will clog up the pipes…. not something you want to be doing. For this reason, most people just make foot baths in a bowl. It is effective that way, though of course, if you can take a full bath it will be even more beneficial. My mom and I invented our own clay-filter for the drain after consulting a plumber to try and solve the problem. We bought a cheap sink drain thing:

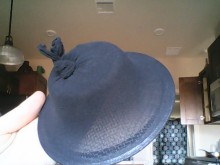
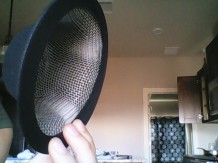
And we put a two layer thick cover of pantyhose to cover it, using a new one each bath:
Make sure that you don’t cover the whole bottom of the sink drain or it will block the drain too much and the water won’t go through.

Sometimes if the layer of clay gets too think on the outside of the pantyhose, you need to wipe it off. Once all the water is drained and you are left with clay… well, be creative. The best I have come up with to get the rest of the mud out is paper towels, though I suspect that a squeegee might help. If you have any ideas that have worked better for you, please comment below.
Once you have got the clay out to your best ability, fill the bathtub again, and drain it (you don’t have to use the clay filter thingy for that). The pressure should help to get anything that got into the drain out.
Also, make sure that you throw the wet, muddy paper towels away in the kitchen or outside trash… them sitting in a wet pile in the bathroom trash for a while with your toxins that were drawn out of you just may not be a good thing.
I would also shower after a bath to rinse all the clay off of you. It is irritating and messy if you don’t.
Okay, so those are pretty complicated and time-consuming instructions for a simple bath, I know, but they are worth it. If you don’t feel any difference from them, you may not need to do them, or at least not as often. It means that there aren’t as many toxins in you… a good thing! That means your liver is properly handling any mold or chemicals you are exposed to and that it doesn’t need help.The other thing is, keep in mind that all those instructions are the culmination of multiple people’s long time experience, so while they may seem like a lot to remember, and we didn’t have to remember that all when we started taking baths, they are all important factors. That way you don’t have to work through it in trial and error, like me. 🙂

Trackbacks/Pingbacks